Manage titles and approve audience levels
If you manage titles at the district level, you can view a book's details, see its location, edit its title, and set an audience level. You have the option to set audience levels individually and push them to all classroom libraries in the district.
If you already have a list of titles with audience levels, you can import it via a CSV file. When these titles are added to classrooms, the audience level is automatically set.
|
Notes:
|
To manage audience levels for titles:
- Log in to Destiny as a district-level administrator.
- From the primary navigation bar, select
 > Classroom Library. The Classroom Directory page appears.
 - From the sidebar, click Title Management.
Note: The Title Management page only appears if you enable it. To do so:
- From the sidebar, click Settings.
- Select the Start district management of classroom titles checkbox.
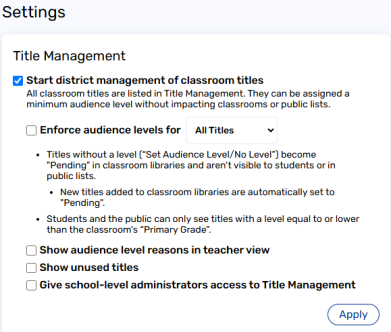
- Click Apply.
- From the Title Management page, do any of the following:
If you want to... Then... View title details (in Titlewave®) Do one of the following:
- Next to the desired title, click
 .
. - Click a title. From the pop-up, click the title or
 .
.
Titlewave® opens to the title details page.
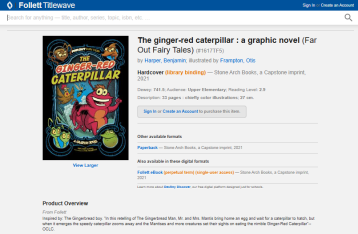
Notes:
- The
 icon appears next to all titles with an ISBN. If a title's details are unavailable in Titlewave, a message lets you know no Titlewave matches were found.
 - If you edit a title, the connection to Titlewave will remain, regardless of any changes you make to the title's information.
View a book's location Click a title. Details of the book's location – including the school, classroom, and class grade – appear.

Edit a title - Click a title. A pop-up appears.

- Click Edit Title.
- Make any changes, and then click Save Title.
Note: If your changes result in a duplicate title record, you can merge titles. From the pop-up that appears, select the record you want to keep, and then click Merge Titles.
Delete a title - Click a title. A pop-up appears.

- Click Delete Title.
Note: You can only delete unsused titles.
Enter a title, author, or ISBN in the field. A list of search results appears.
Notes:
- You can search for titles with 10-digit or 13-digit ISBNs. Titles with 10-digit ISBNs are automatically converted.
- Search results remain until you click
 or enter another search term in the field.
Filter titles
- Click
 .
. - Click
 to filter by Date Added, Approved For Audience Level, Interest Level, and Site.
Export titles
Click Export. The CSV file downloads to your browser's Downloads folder.
Note: To export a specific list of titles, select the checkboxes next to the titles you want to include. Then, click Export.
Sort titles by date
In the MOST RECENT column, click the drop-down to change the sort order.
Set an audience level for a title(s) and add a reason (optional)
Do one of the following:
- To set the audience level for a single title, in the APPROVED FOR column, choose an option from the drop-down.
- To set the audience level for multiple titles, select the checkboxes next to the desired titles. In the bottom-right corner, choose an option from the drop-down.
Notes:
- If you want to add a reason for the audience level you selected, type it in the field, and then click Set Audience Level. The field has a maximum limit of 100 characters.
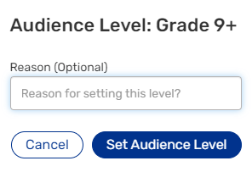
- When you set the audience level for a specific title, you are assigning it to every copy in your district. The SITES and CLASSES columns show you the number of schools and classrooms with that title.
- Next to the desired title, click
To push audience levels to the district:
After you assign audience levels to your titles, you can enforce them by pushing them to all classroom libraries in the district. Teachers can see which titles have not been approved for their classroom.
You can set approval levels for all titles or only specific ones. If you choose all titles, then any new title a teacher adds to their library is automatically assigned a Pending status until an audience level is set by the district. If you only want to set levels for specific titles, then any new title a teacher adds to their library is automatically approved for everyone unless you change its level.
Titles without a level are not visible to students. Students can only see titles with a level that is equal to or lower than their primary grade.
|
Notes:
|
|
Important: If the Enforce audience levels for checkbox is disabled and the Start district management of classroom titles checkbox is enabled, district-level administrators can set audience levels without pushing them to the district. |
- Log in to Destiny as a district-level administrator.
- From the primary navigation bar, select
 > Classroom Library. The Classroom Directory page appears.
 - From the sidebar, click Settings.
- Select the Enforce audience levels for checkbox.

- From the drop-down, select one of the following:
- All Titles: Assign audience levels to all titles in the district. Titles added to classroom libraries are automatically pending until you set an audience level.
- Specific Titles: Assign audience levels to only specific titles in the district. Titles added to classroom libraries are automatically approved unless you change an audience level.
- Click Apply.
To add multiple audience levels via a CSV file:
- Log in to Destiny as a district-level administrator.
- From the primary navigation bar, select
 > Classroom Library. The Classroom Directory page appears.
 - From the sidebar, click Settings.
- From the Task drop-down, select Set Audience Levels.
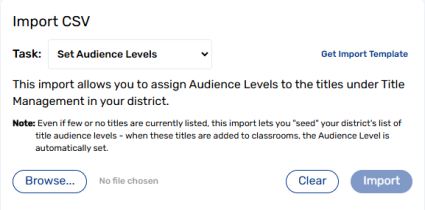
- Click Browse, and then select the desired CSV file from your computer.
- Click Import. The number of audience levels updated appears.
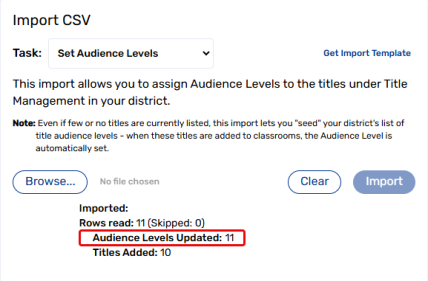
Note: If you need an import template for your audience levels, do the following:
- From Import CSV > Set Audience Levels, click Get Import Template.
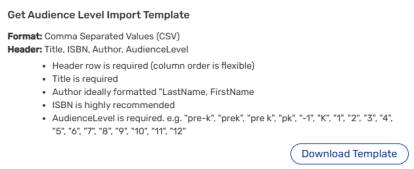
- Click Download Template. The template downloads to your browser.
- From Import CSV > Set Audience Levels, click Get Import Template.
