Create flexible libraries
District and site-level administrators can create flexible libraries to support titles at a site that are independent of a classroom or school library. For example, maybe your school has books in the guidance office or a stand-alone reading quad area.
Once you create a flexible library, you can add books to it, as well as edit, delete, or export it.
|
Note: Administrators can create a maximum of 25 flexible libraries per site. If you attempt to create more than 25, you'll be asked to delete one before creating a new one. |
To create a flexible library:
- Log in to Destiny as a district or site-level administrator.
- From the primary navigation bar, select
 > Classroom Library. The Classroom Directory page appears.
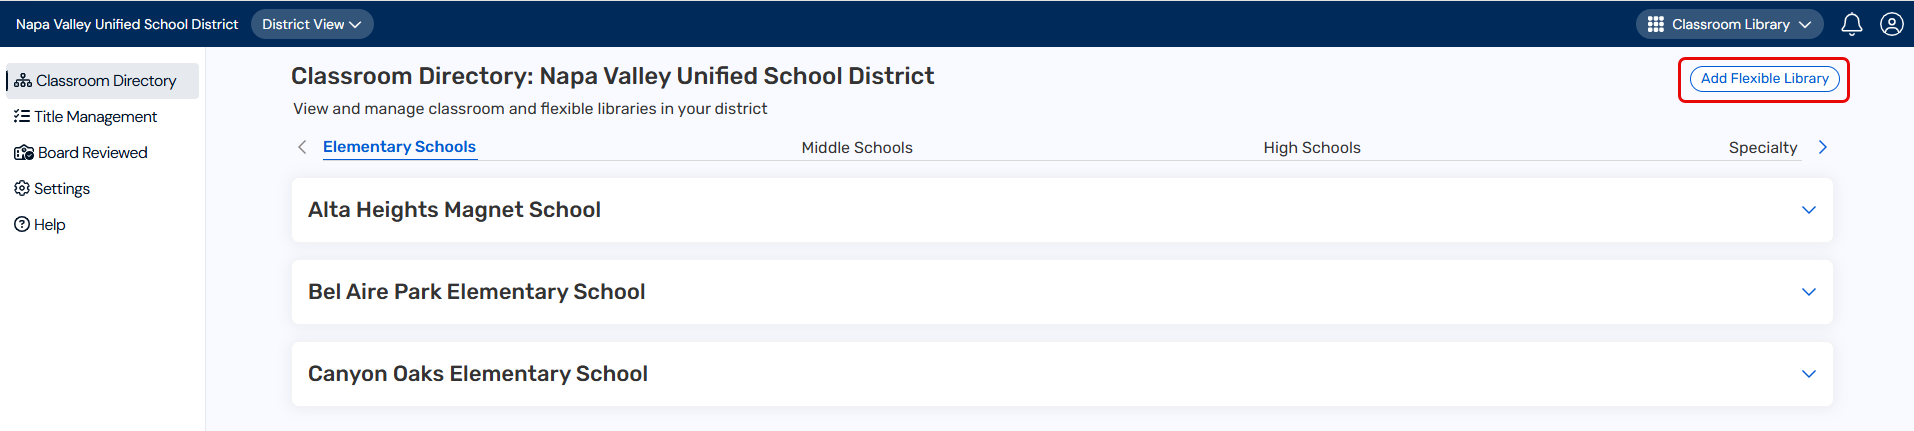
- At the top-right, click Add Flexible Library. A pop-up appears.
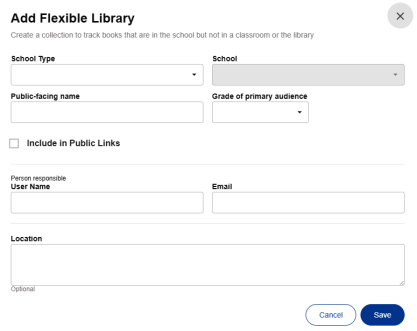
- Use the following table to fill in the fields:
Field Description School Type (required) Select the school type from the drop-down (district-level only). School (required) Select the desired school from the drop-down (district-level only).
Note: You must select a school type before you can choose a school.
Public-facing name (required)
Enter a name that will appear when you share a public link to your flexible library. For example, Counseling Office or 6th Grade Reading Club.
Grade of primary audience (required)
Select the desired grade level from the drop-down.
Include in Public Links (optional)
Select this checkbox if you want the flexible library to appear when sharing a public link.
User Name (required)
Type the name of the person responsible for the flexible library. Email (required)
Type the email address of the person responsible for the flexible library. Location (optional)
Enter the location of the flexible library.
- Click Save.The flexible library appears in the Classroom Directory.

- Use the following table to determine your next steps:
If you want to...
Then... - In the row of the flexible library you want, under Actions, select
 > Add Books.
Note: You will be redirected to the Library page in the teacher module.
- Click the Add Books tab.
- Under Add Books, choose the desired method by clicking the corresponding tab.
Note: For more information on adding books, click here.
- In the row of the flexible library you want, under Actions, select
 > Edit Flexible Library.
 - From the pop-up that appears, edit the desired information.
- Click Save.
- In the row of the flexible library you want, under Actions, select > Delete Flexible Library. A message asks you to confirm.
- Click Delete Flexible Library.
Important: Deleting a flexible library is permanent. It cannot be undone.
- In the row of the flexible library you want, under Actions, select > Export Flexible Library. The CSV file downloads to your browser's Downloads folder.
- Click the file to open it. Exported information includes title, author, ISBN, bin name, funding source, and audience levels.
- In the row of the flexible library you want, under Actions, select