Add classroom titles
District-level administrators can use a CSV file to import titles into teachers' classroom libraries.
|
Notes:
|
To add titles:
- Log in to Destiny as a district-level administrator.
- From the primary navigation bar, select
 > Classroom Library. The Classroom Directory page appears.
- From the sidebar, click Settings.
- In the Import classrooms, titles, and audience levels row, click
 .
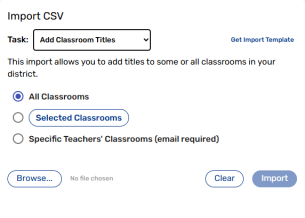
- From the Task drop-down, select Add Classroom Titles.
Notes:
- If you need an import template for your classroom titles, click Get Import Template. From the pop-up that appears, click Download Template. The template downloads to your browser.
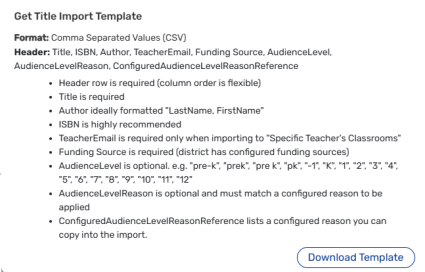
- If you create funding sources on the Settings page, you must assign a funding source to each title before importing a CSV file.
- You cannot create a new audience-level reason during an import. New reasons must be added on the Settings page before importing the file.
- If you need an import template for your classroom titles, click Get Import Template. From the pop-up that appears, click Download Template. The template downloads to your browser.
- Do any of the following:
- To add titles to every classroom in the district, click All Classrooms.
- To add titles to specific classrooms in the district, click Selected Classrooms. A pop-up appears.
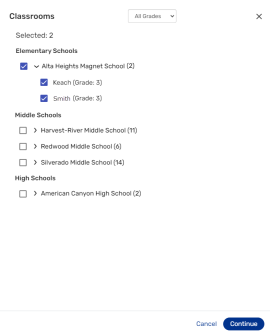
- Select the desired checkboxes for the schools or classrooms you want to add titles to.
Note: To filter by grade, select an option from the drop-down at the top of the page.
- Click Continue.
- Select the desired checkboxes for the schools or classrooms you want to add titles to.
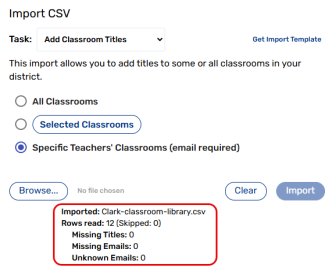
- To add titles to a classroom via teacher email address, click Specific Teachers' Classrooms (email required). All titles associated with that teacher will be imported to the appropriate classroom.
Notes:
- If multiple classrooms are associated with the same teacher's email, all classrooms will receive the imported titles.
- When the Specific Teachers' Classrooms option is selected, any titles in the CSV file without a teacher email will not be imported.
- Click Browse, and then select the desired CSV file from your computer.
- Click Import. The titles are added to the appropriate classrooms.
Depending on the option you selected, a summary shows the number of rows read, audience-level reasons updated, missing titles, missing emails, and more.