Set up district and site users for District Classroom Library Manager
Both district-level and site-level users in Destiny Library Manager can access District Classroom Library Manager.
Access levels regulate what users can see and do in Destiny, while roles determine what actions users can perform in District Classroom Library Manager. Roles are assigned to a Destiny access level. Depending on how access levels are managed in your district, either a Destiny Administrator or a site-level administrator can set access levels and roles.
A user that needs access to all the classroom libraries in the district should be set up as a district-level administrator. A district administrator can view classroom directories, set audience levels and push them to all classrooms in their district, create classroom libraries, add titles, share links, and more.
A user that only needs access to the classroom libraries at their site should be set up as a site-level administrator. A site administrator can view classroom directories, edit classroom libraries, share links, and more.
|
Notes:
|
To add a district user:
- Log in to Destiny as a Destiny Administrator.
-
Select the Applications menu
 > District Setup.
- Next to Destiny Administrator, click the Add a User
 icon. The Add District User page appears.
 - Enter the User Name, New Password, and Confirm Password.
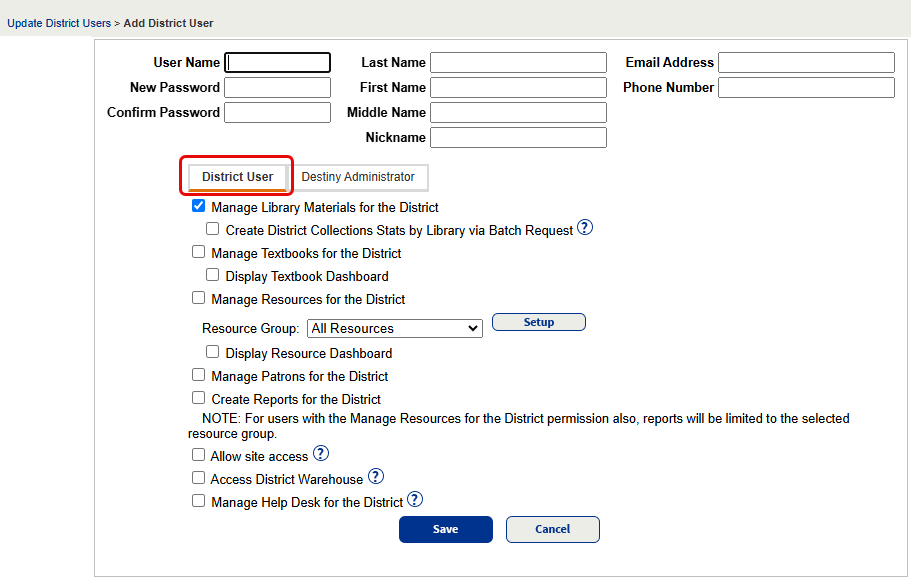
- In the Last Name, First Name, Middle Name, Nickname, Email Address, and Phone Number fields, enter the user's demographic information.
- On the District User tab, select permissions for the user. You must select the Manage Library Materials for the District checkbox for a new district user who needs access to District Classroom Library Manager.
|
Note: Select Allow site access to give district users access to each site in the district. |
To set access levels and roles:
- Log in to Destiny as a Destiny Administrator or site-level administrator.
- Do either of the following (depending on your user type):
- For Destiny Admins, select Setup > District Options tab.
- Next to Access Levels, click Edit.
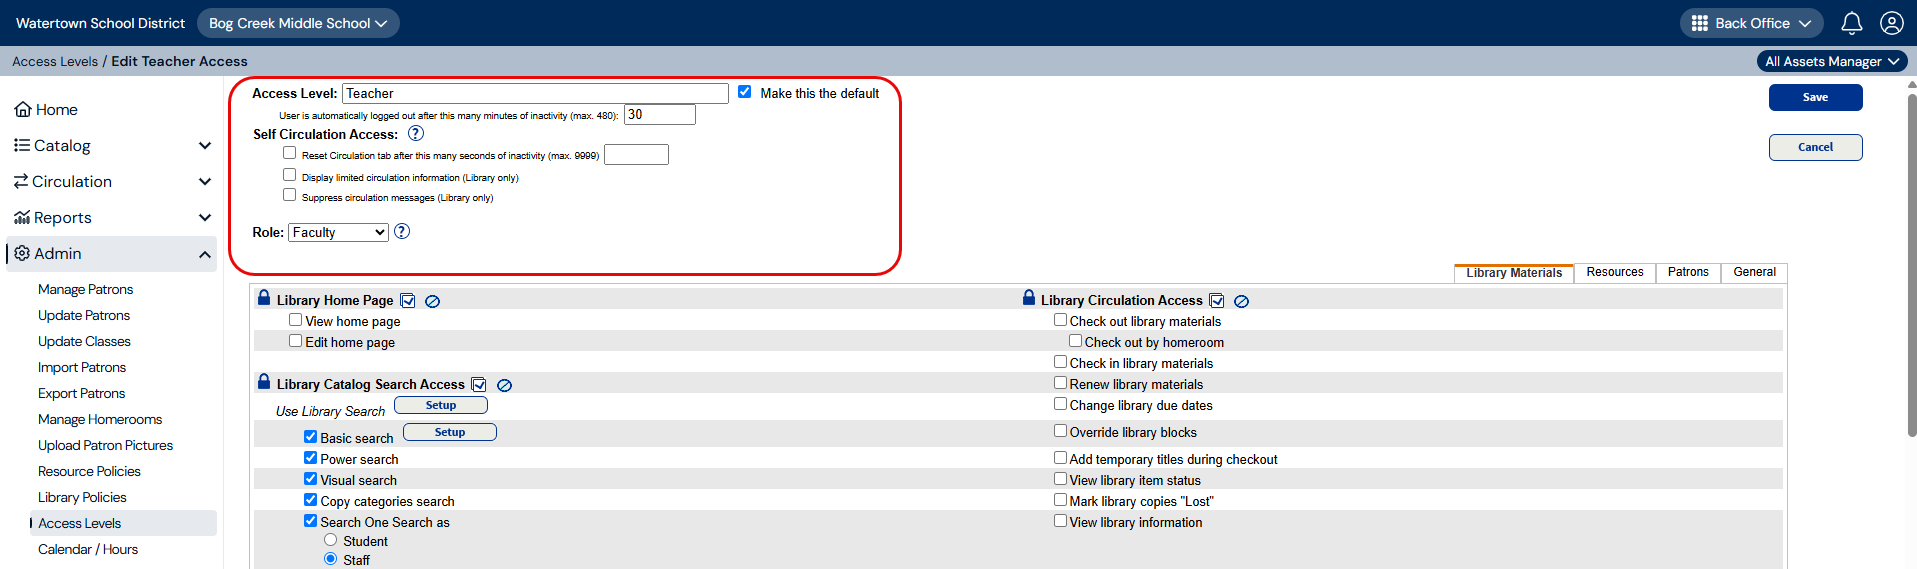
- For site-level administrators, select Admin > Access Levels.
- Do one of the following:
- To edit an access level, click
 .
. - To create a new one, click Add Access Level.
- To edit an access level, click
- In the Access Level field, enter one of the following:
- Administrator: For district and site-level users
- Teacher or Staff: For site-level users
- Under the Access Level field, type the number of minutes users with that access level can be idle before Destiny logs them out.
Note: Users are granted specific permissions by default. For more information, see Destiny Help.
- From the Role drop-down, choose one of the following:
- Administrator: For district and site-level users
- Faculty, Instructor, or Staff: For site-level users
- Click Save.
The following table explains the roles and permissions for specific users in District Classroom Library Manager:
| Role | Can access... |
|---|---|
|
Administrator (district user) |
|
|
Administrator (site user) |
All classrooms at a site and their shareable links |
|
Faculty, Instructor, or Staff (site user) |
|