Manage students

You can add students to your classroom library individually, import them from a homeroom, or enter their information manually.

Student records let you manage library activity, including checkouts, returns, checkout history, and student information.

Note: Students must be added before they can access the student kiosk.

To add students:

  1. From the sidebar, select Students > Manage Students. A pop-up appears.
    Manage Students pop-up.

  2. Do any of the following:

    If you want to...Then...

    Search for and add students individually

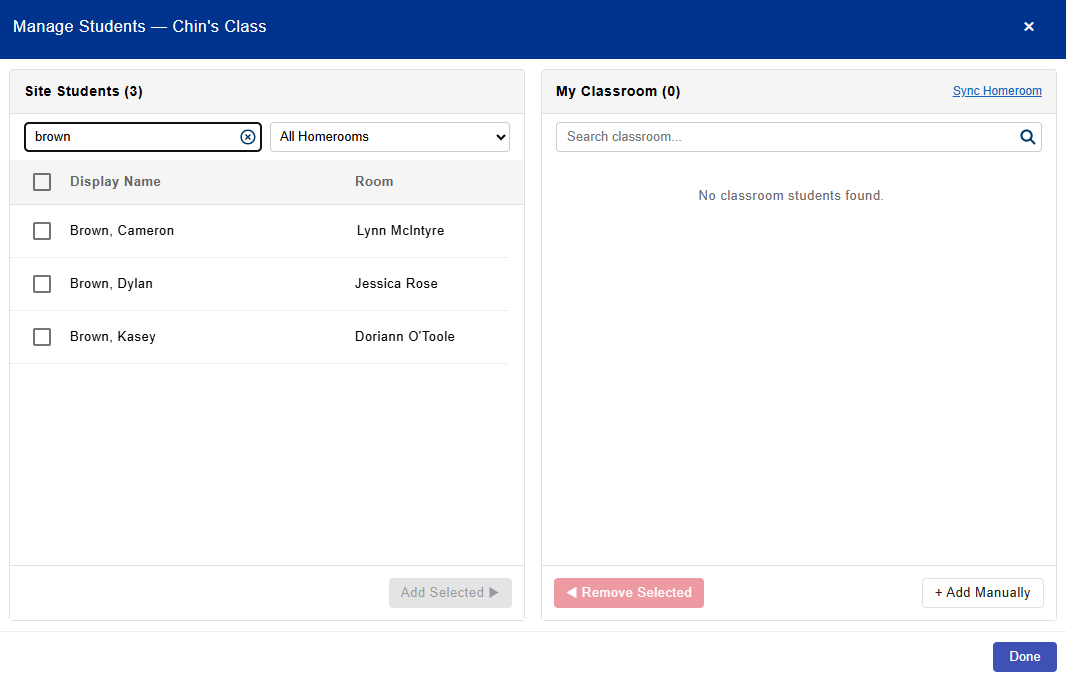
    1. Under Site Students, type a name in the search field.
    2. Click Search icon. or press Enter.

      Manage Students page showing a student name in the search field and corresponding search results.

    3. Select the checkboxes next to the desired student names.
    4. Click Add Selected. The selected students appear in your classroom library.

    Search for and add students by homeroom

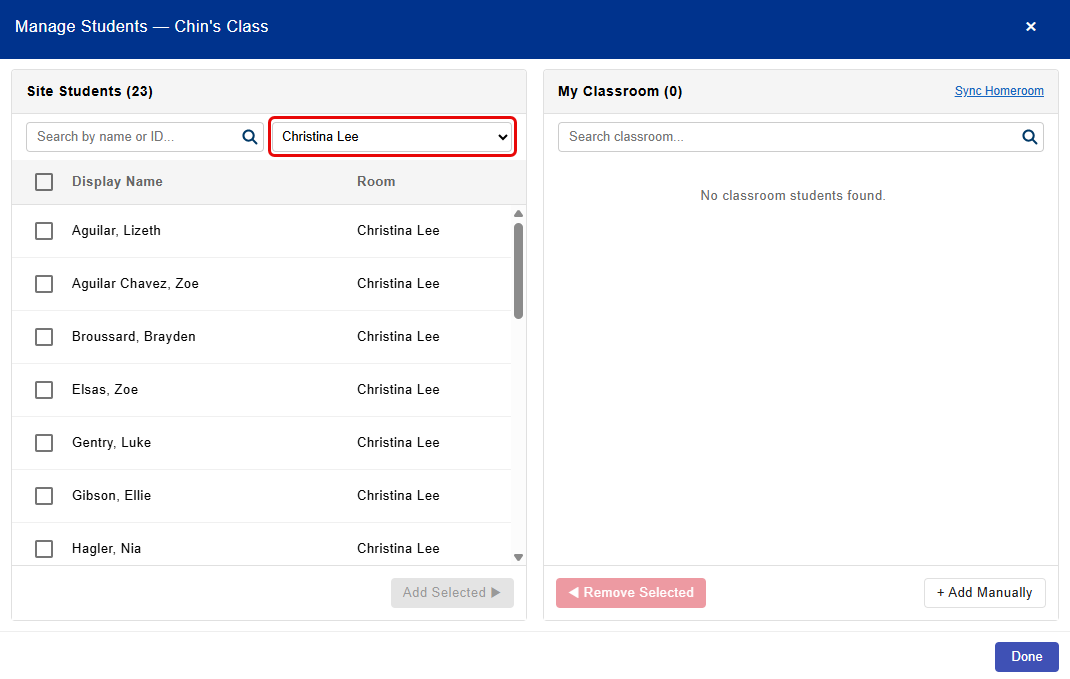
    1. From the drop-down, select a homeroom.

      Manage Students page showing the selected homeroom and its students.

    2. To import all students, select the Display Name checkbox. All student names are selected.
    3. Click Add Selected. The students appear in your classroom library.

    Search for and remove students

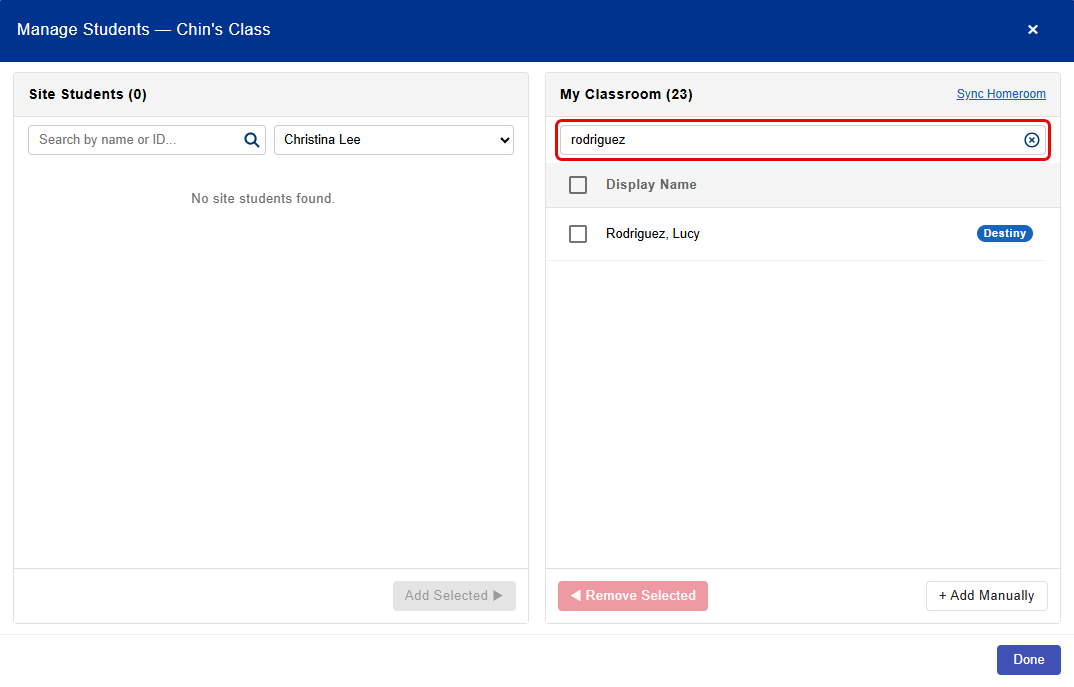
    1. Under My Classroom, type a name in the search field.

      Manage Students page with a student name to be removed entered in the search field.

    2. Select the checkboxes next to the student names.
    3. Click Remove Selected. The students are removed from your classroom library.
    Add students manually
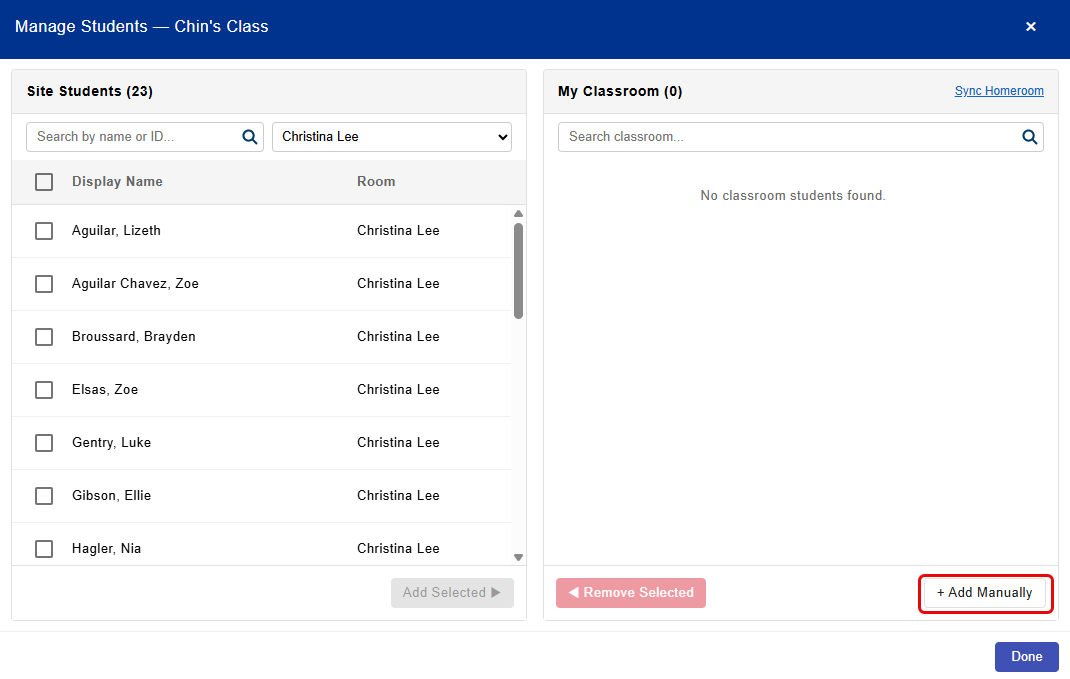
    1. In the bottom-right corner, click Add Manually.

      Manage Students page with Add Manually option highlighted.

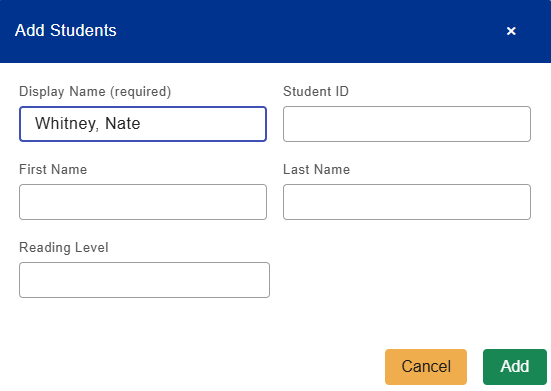
    2. In the pop-up, type a student name in the Display Name field.

      Add Students pop-up with Display Name, Student ID, First Name, Last Name, and Reading Level fields.

    3. Complete the remaining fields, if needed.
    4. Click Add. The student appears in your classroom library.

    Note: When you add students manually, any information you enter does not update their student records in Destiny.

    Sync a homeroom

    If you have a Destiny homeroom, you can sync your students automatically.

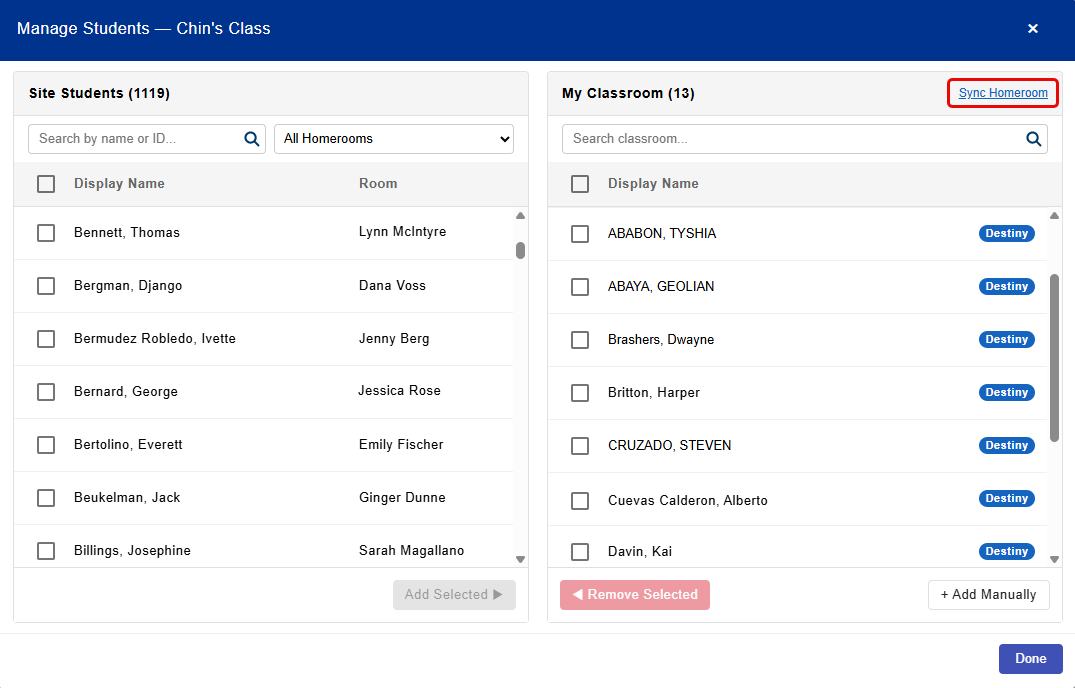
    At the top-right corner, click Sync Homeroom. Your students appear in your classroom library.

    Manage Students page with Sync Homeroom link highlighted.

  3. When you are finished, click Done.

To edit or delete a student record:

  1. From the sidebar, click Students. The Students page appears.
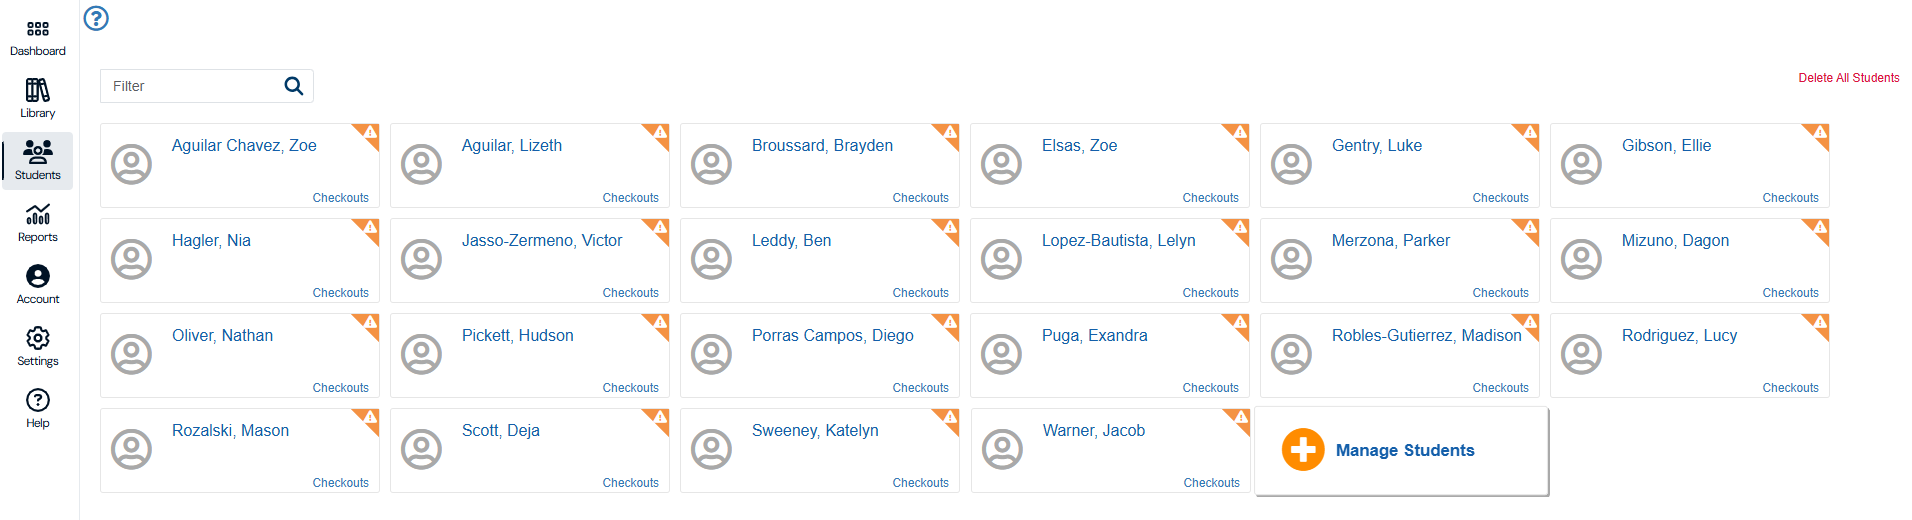
    Students page.

  2. Click a student's name to see their details.
  3. Do either of the following:
    • To edit the student record, enter the changes, and then click Save.
    • To delete the student record, click Remove.
  4. To remove all student records, click Delete All Students. A confirmation message appears.
  5. Click Delete All.

    Important: Deleting students is permanent. It cannot be undone.

To manage student checkouts and returns:

  1. On the student's record, click Checkouts. A pop-up appears.
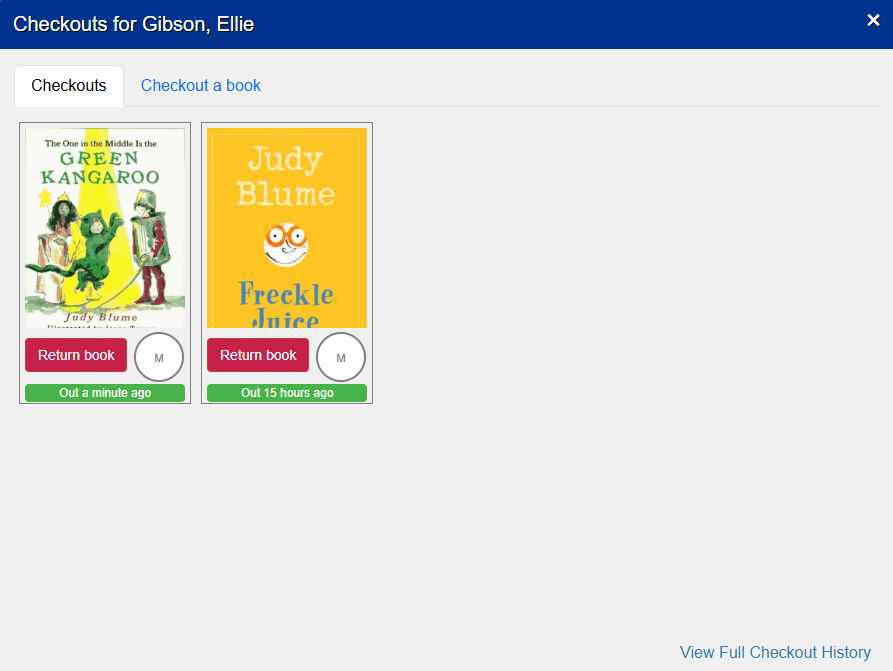
    Checkouts pop-up.

  2. Do any of the following:
    • Return a book for the student: Select Return book. The book is automatically returned to the appropriate bin. A message reminds you to place it in the correct bin in your classroom.
    • Check out a book for the student: Select Checkout a book > Checkout book. To find a book, type its title, author, or level in the Search field.
    • See the student's checkout history: Click View Full Checkout History.