Manage books in your library
You can manage books in your library by moving them between bins, setting funding sources for individual titles or groups of titles, deleting titles, exporting a list, or editing title details.
You can also search for a title or change the sort order to find books more quickly.
|
Notes:
|
 > Titles Reviewed.
To move books to a different bin or set a funding source:
- From the sidebar, select Library > Manage Library.
- Select the checkbox next to each book you want to update.
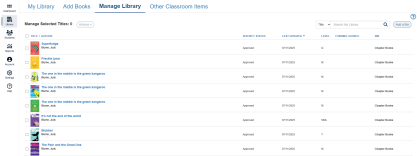
Notes:
- To choose all titles, select the TITLE/AUTHOR checkbox.
- To assign a funding source to a title, select an option from the FUNDING SOURCE drop-down. Funding sources assigned by the district display the
 icon.
icon.
- At the top of the page, select Actions > Edit Selected. A pop-up appears.
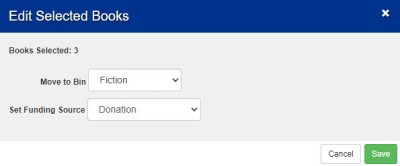
- Do one or both of the following:
- From the Move to Bin drop-down, select the bin you want to move the book or books to.
- From the Set Funding Source drop-down, select the funding source you want to apply.
- Click Save.
|
Note: To create a new bin, click Add a Bin in the top-right corner of the page. For more information on adding books, click here. |
To delete books:
- Select Library > Manage Library.
- Select the checkbox next to each book you want to delete.
- At the top of the page, select Actions > Delete Selected. A pop-up appears.
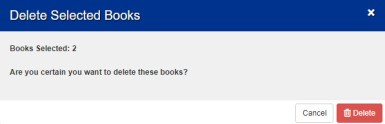
- Click Delete.
|
Important: Deleting a book is permanent. It cannot be undone. |
To export titles to a CSV file:
- Select Library > Manage Library.
- Select the checkbox next to each titles you want to export.
- At the top of the page, select Actions > Export Selected. A pop-up appears.
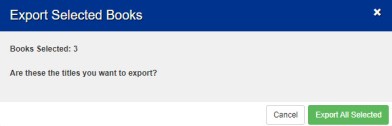
- Click Export All Selected. The CSV file downloads to your browser's Downloads folder.
|
Note: Exported information includes title, author, ISBN, bin name, funding source, and audience level. |
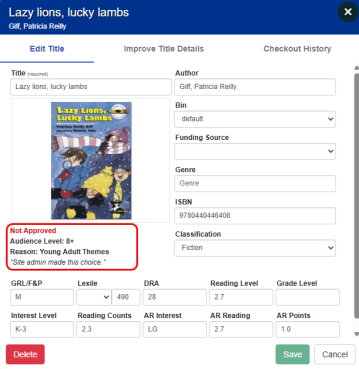
To edit a title's details:
- Select Library > Manage Library.
- Click the title you want to edit.
- On the Edit Title tab, make your changes.
- Click Save.
|
Note: If your district assigns audience levels to titles and a reason for the assigned level, you can view that information on the Edit Title tab.
|
To search for a title:
- Select Library > Manage Library.
- From the search drop-down in the top-right corner, select Title, Author, ISBN, Bin, or Lexile/interest level.
- Enter the search term.
- Press Enter.
To change the sort order:
- Select Library > Manage Library.
- Click a column heading once to sort in ascending order or twice to sort in descending order.
You can sort by:
- TITLE
- AUTHOR
- DISTRICT STATUS
- LAST UPDATED
- LEVEL
- FUNDING SOURCE
- BIN
Note: Books are sorted numerically by Lexile or interest level. If no Lexile level is available, the sort order defaults to interest level.
The list of books refreshes automatically based on your selection.